No products in the cart.
AI Tools for Marketing
Chatbot development tutorial: Setting Up and Running a Chatbot with LangChain and Chainlit
In this tutorial, we’ll walk through the process of setting up and running a chatbot using LangChain and Chainlit. LangChain is a framework for developing applications powered by large language models (LLMs), and Chainlit is a tool for rapidly developing and sharing LLM-powered applications.
Prerequisites
Before we begin, make sure you have the following:
- Python 3.6 or later installed on your machine. You can download Python from the official website.
- An OpenAI API key. You can get one by signing up on the OpenAI website.
Step 1: Set Up a Virtual Environment
First, we’ll set up a virtual environment for our project. A virtual environment is a self-contained Python environment in that we can install packages without affecting other Python projects on our machine.
Open a terminal window, navigate to the directory where you want to create your project and run the following command to create a new virtual environment:
python3 -m venv env
This command creates a new virtual environment in a directory called env.
Next, we’ll activate the virtual environment. The command to do this depends on your operating system:
- On Unix or MacOS, run:
source env/bin/activate - On Windows, run:
.\env\Scripts\activate
When the virtual environment is activated, you should see (env) or something similar at the start of your command prompt.
Step 2: Install the Necessary Python Packages
With our virtual environment activated, we’ll install the necessary Python packages: LangChain and Chainlit. Run the following command to install these packages:
pip install langchain chainlit
Step 3: Create the Chatbot Script
Next, we’ll create a new Python file for our chatbot script. You can name this file anything you like, but for this tutorial, we’ll call it chatbot.py.
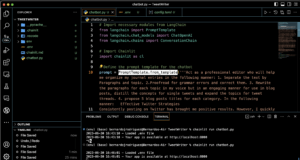
Open chatbot.py in a text editor and add the following code:
# Import necessary modules from LangChain

from langchain import PromptTemplate

from langchain.chat_models import ChatOpenAI

from langchain.chains import ConversationChainimport chainlit as cl
prompt = PromptTemplate.from_template(”’
You are a helpful chatbot.
Please answer my questions to the best of your abilities.
Previous Conversation:
{history}
Human: {input}
”’)
llm = ChatOpenAI(openai_api_key=‘YOUR OWN API KEY’)
chain = ConversationChain(llm=llm, prompt=prompt)
def factory():
return chain
Replace 'YOUR OWN API KEY' with your actual OpenAI API key.
This script sets up a chatbot using LangChain and Chainlit. The PromptTemplate sets the context for the chatbot’s responses, the ChatOpenAI object interfaces with the OpenAI API to generate responses and the ConversationChain object manages the conversation with the user.
The @cl.langchain_factory decorator defines a factory function for Chainlit. This function returns the ConversationChain object when called, which Chainlit uses to create the chatbot when the application starts### Step 4: Run the Chatbot
With our chatbot script ready, we can now run our chatbot. Make sure your virtual environment is activated, then open a terminal and navigate to the directory where you saved chatbot.py. Run the following command to start your chatbot:
chainlit run chatbot.py
This command starts the Chainlit application defined in chatbot.py.
Step 5: Update and Restart the Chatbot
If you make changes to your chatbot.py file, you’ll need to restart the Chainlit application for the changes to take effect.
First, stop the running application by pressing Ctrl+C in the terminal. Then, start the application again with the chainlit run chatbot.py command.
Wrapping Up
That’s it! You’ve set up and run a chatbot using LangChain and Chainlit. Remember, this is a basic setup. You’ll need to add more code based on how you want to use the chatbot. Specifically, I recommend using a system prompt when you find yourself constantly pasting the same prompt to chatgpt.
For more detailed guidance, check out the LangChain and Chainlit documentation. Happy coding!


